A water microscope is a simple and inexpensive way to explore the world of tiny things. It can be made with materials you probably have around the house, and it’s a great way to introduce kids to the basics of microscopes.
Materials needed:
- Magnifying glass
- Double-sided tape
- Water
- Pipette or eye dropper
- Empty plastic water bottle
- Clear plastic lid (from recycling)
- Specimens to examine: dried bugs, flower or leaf cuttings
- Scissors
- *Adult supervision
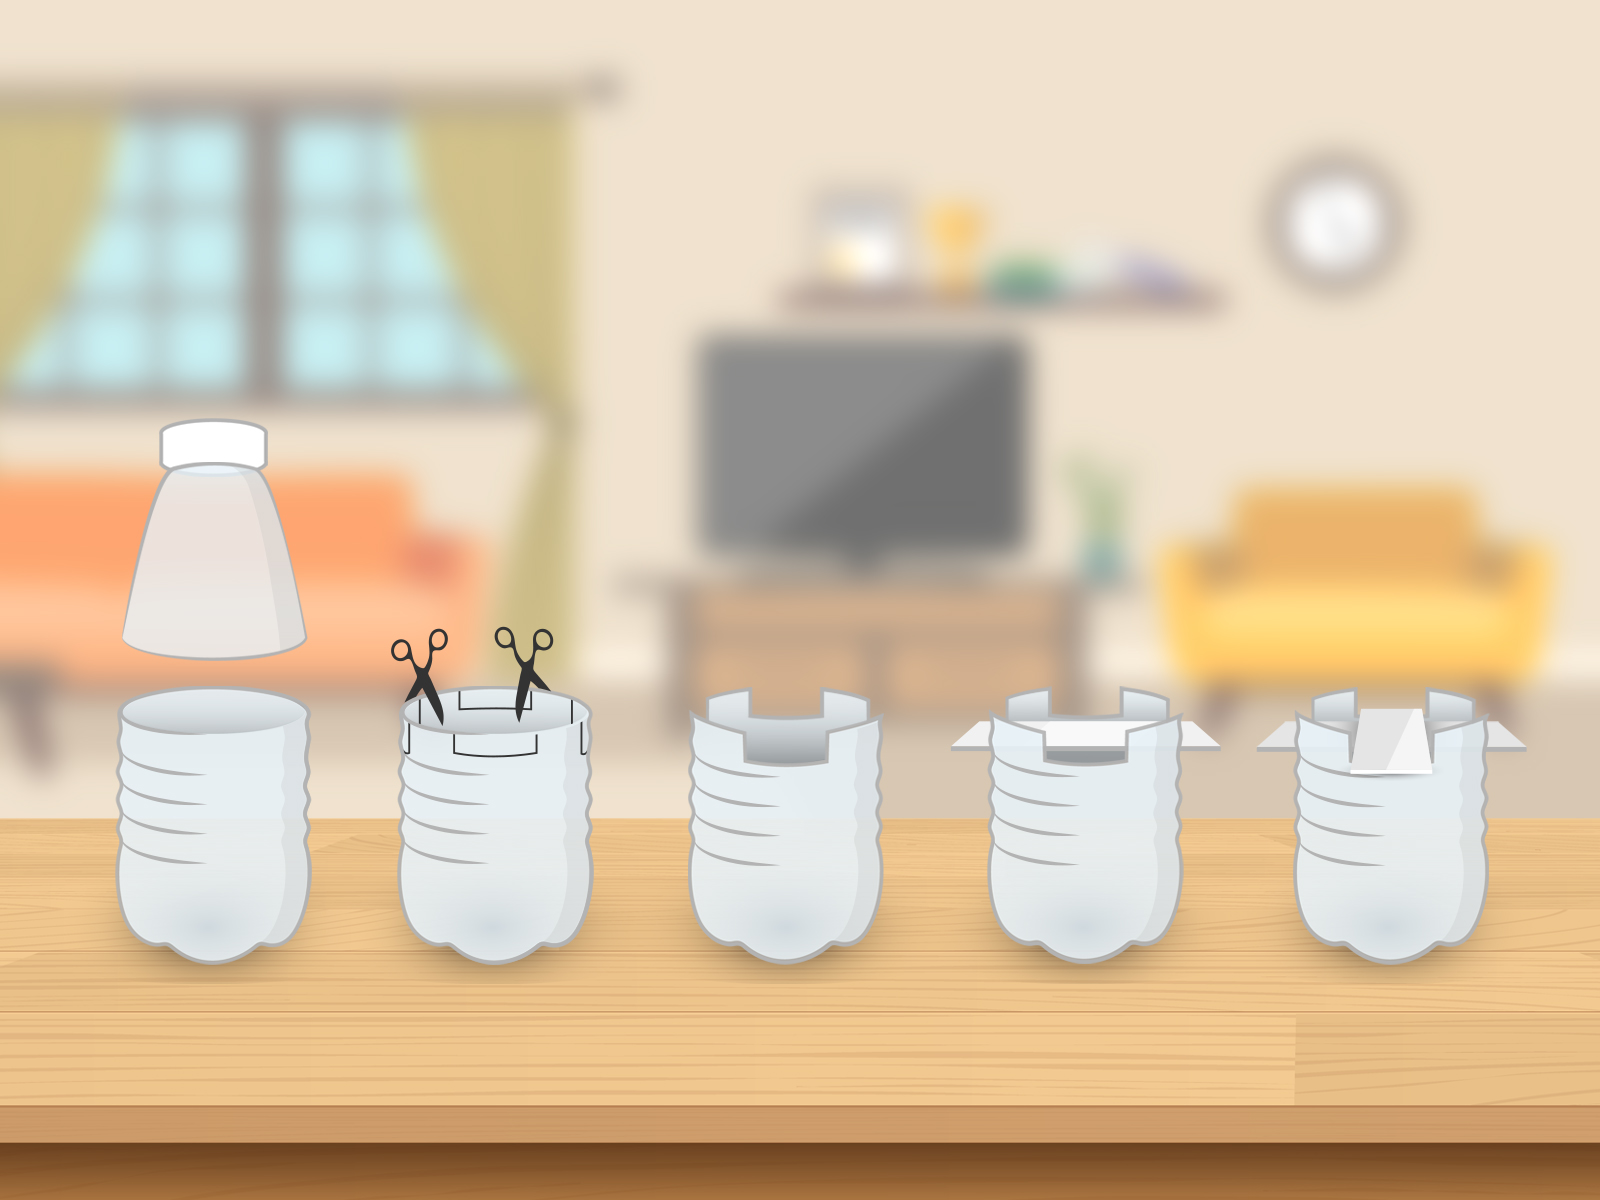
- To make the viewer, first cut the plastic bottle in half
- Cut 2 notches into the cut edge, across from each other. Notches should be about 2” wide and about ½” deep. These notches will hold a slide so try to make them the same depth.
- Cut 2 deeper notches, about 1-1/2” deep, in-between the first 2 notches. Notches should be about 2” wide, and across from each other. These notches will also hold a slide.
- Make your slides by cutting a clear plastic lid into strips, about 1 to 1-1/2” wide. They should fit into the notches you made.
- Place a small piece of double-stick tape in the center of the slide to hold your specimen.
- Gently press specimen onto the tape.
- Place slide with specimen on the lower notches.
- Place another blank slide on the upper notches.
The science behind the experiment:
The water droplet enlarges the image because it creates a convex lens which magnifies your specimen. Adding the additional glass further magnifies it. In fact, modern microscopes today are generally compound microscopes, meaning they have many glass lenses in them.