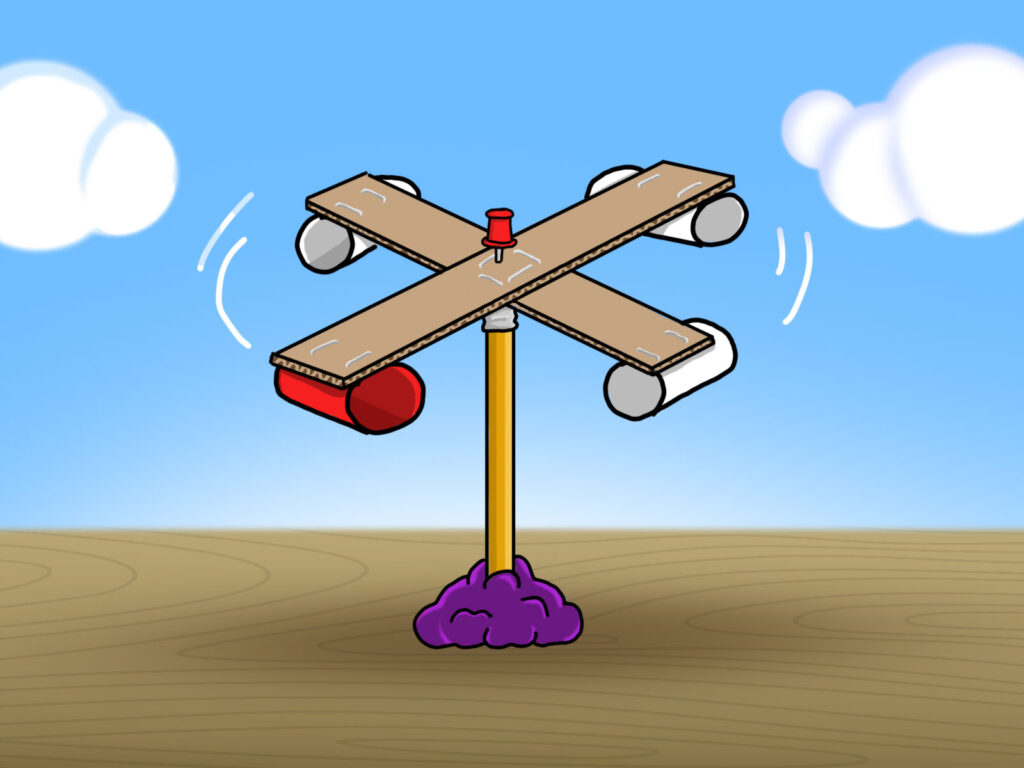
Building a wind meter, or anemometer, is a fun and educational activity for kids. It’s a great way to learn about wind speed. Let’s measure the wind!
Materials You’ll Need:
- 4 small paper cups
- Push pin
- New pencil with eraser on the end
- Stiff, corrugated cardboard (enough to cut two, same-size strips, each 1.5” wide x 10” long)
- Scissors
- Marker
- Ruler (for measuring)
- Stapler
- Modeling clay
- Parent supervision
Instructions:
- Color the entire outside of one paper cup with the marker.
- With parental supervision, cut out two same-size strips from the cardboard (1.5” wide x 10” long)
- Staple the two pieces of cardboard together in the center so they form an X.
- Staple each paper cup (laying on their sides) to the ends of the cardboard X, making sure the cups all face the same direction.
- Create the base: Flip the cardboard X over, so the cups are on the bottom. With parental supervision, push the pushpin through the center of the carboard X and into the eraser of the pencil. Make sure the cups can spin freely.
- Test it out! Take your anemometer outside on a windy day and watch it spin. You can count the number of times the colored cup passes a fixed point in a minute to estimate wind speed. The faster it spins, the stronger the wind!
- You can hold your anemometer, or you can create a base to hold it, by using an old plastic container & some clay in it to hold the pencil for you.
Remember:
Be very careful when cutting the cardboard and when using the pushpin. Ask an adult for help!
Now you’re a wind scientist!
